2021. 1. 24. 01:56ㆍReact, Javascript

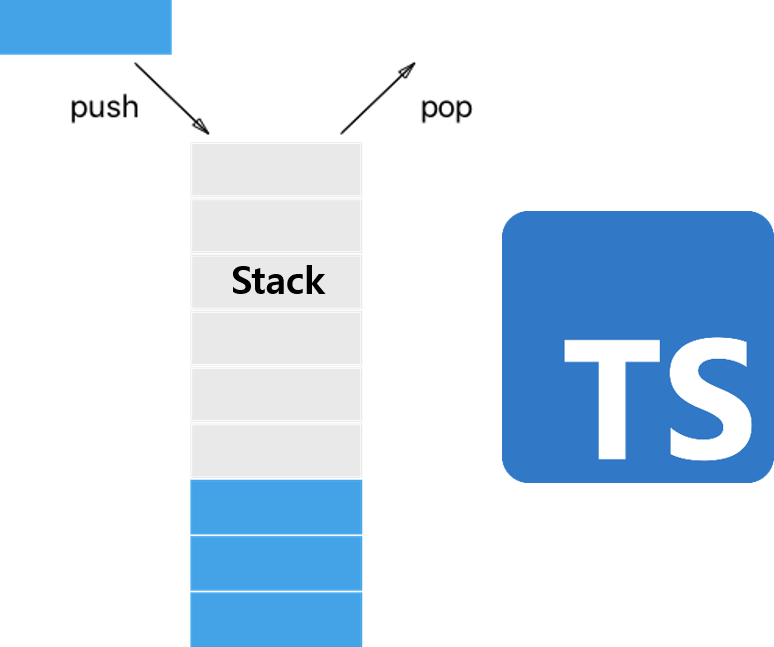
TypeScript를 사용하여 Stack을 구현해 보겠다. 배열(Array) 타입을 쓰면 너무 쉬우니 배열을 쓰지 않고 해보자.
Stack(이하 스택)이 무엇인지는 위키에 잘 나와있다.
스택 - 위키백과, 우리 모두의 백과사전
위키백과, 우리 모두의 백과사전. 스택(stack)은 제한적으로 접근할 수 있는 나열 구조이다. 그 접근 방법은 언제나 목록의 끝에서만 일어난다. 끝먼저내기 목록(Pushdown list)이라고도 한다. 스택은
ko.wikipedia.org
기본 설계
일단 스택이라는 클레스에는 많은 것이 필요할 수 있겠지만 기본적으로 3가지가 필요하다
size    //지금 스택에 얼마나 많은 value들이 있는지 알려주는 변수

push(string):void    // string 값 하나를 스택에 넣는 함수

pop():string         // 스택의 젤 위에 있는 값을 리턴하는 함수
이 포스팅에서는 위 3가지를 스택에 구현해 보겠다.
또한 스택에 넣을 수 있는 데이터 타입도 string으로 제한하겠다.
key Point
스택을 구현함에 있어 다른 언어도 마찬가지겠지만 push로 들어오는 값들을 잘 쌓고, pop으로 나갈때 그것을 다시 정렬해서 메모리에 가지고 있는 것이 중요하다.
이러한 방식을 생각하는 것이 중요하다.

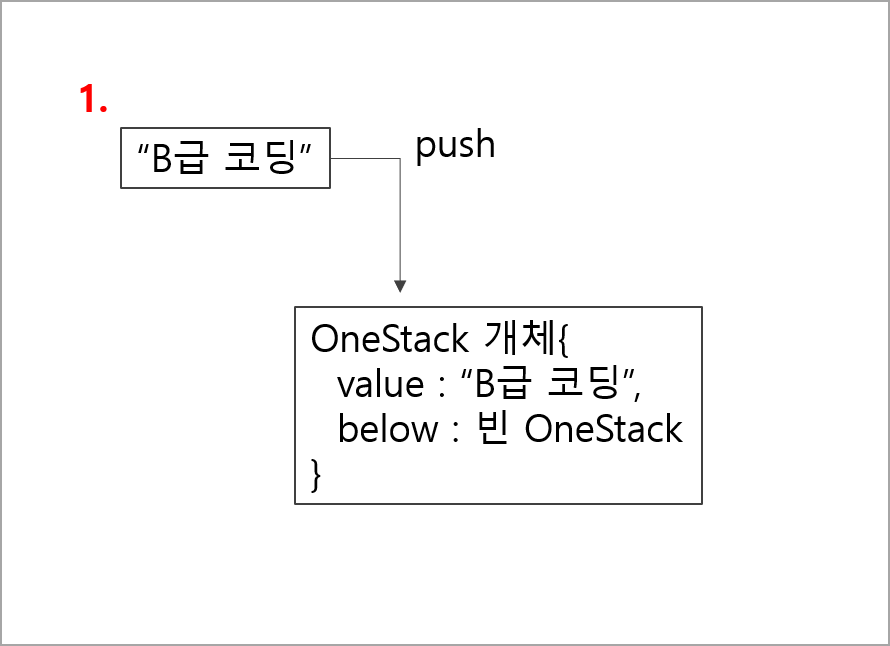
담아둘 객체 OneStack을 value와 below라는 값을 가진 Type으로 만들어 주고
이 below에 다시 자기 자신 객체Type(OneStack)을 넣는 것이다.
감이 오는가?
꼬리 물기 라고 생각하면 된다.
이제 다음 value가 push되어 들어오면 지금 메모리에 올라가 있는 개체를 그대로 below로 보내고
새로들어온 값을 value에 저장하면 되는것이다.
pop을 하게 되면 지금 있는 객체의 value값을 리턴하고 below에 있는 객체를 지금 객체로 가져오면 되는 것이다.
구현
key Point를 바탕으로 구현해보자
//객체 지향 설계에 맞게 stack을 디커플링하게 쓰기 위해서 interface를 정의한다.

interface Stack {

  size(): number;

  push(value: string): void;

  pop(): string;

}


/**
* 그리고 꼬리 물기를 할 OneNode 타입을 선언해 준다.
* below를 보면 자기 자신을 Type으로 갖는 걸 볼 수 있다.
*/

type OneNode = {

  value: string;

  below: OneNode | null;

}


//실제 수행될 메소드들이 정의된 DoStack class를 정의한다.
//생성자와 실제 데이터들이 올라갈 top이란 변수를 위에 만든 OneNode 타입으로 만들어 준다.

class DoStack{

  private top: OneNode;

  constructor() {
    this.top = null;
  }
	//구현

}
이후 Dostack 클레스 안에 들어갈 push 메소드를 구현해 보자.
  push(valueString: string) {

  //top에 들어오는 값이 처음인지를 판단해 준다.
  //처음이라면 들어온 값을 그대로 value에 담아주면 된다.

    if (this.top === null) {
      const node: OneNode = {
        value: valueString,
        below: null,
      };
      this.top = node;

 //만약 들어온 값이 처음이 아니라면
 //지금의 객체를 below로 보내고 들어온 값을 value에 세팅하면 된다.
    } else {
      this.top.below = {
        ...this.top,
      };
      this.top.value = valueString;
    }
  }
이제 pop 메소드를 구현해 보자
  pop(): string {

  	//값이 없을때는 Error를 발생시켜 준다.
    if (this.top === null) {
      throw new Error("Not Exist value");
    }

//값이 2개 이상 있을때 현재 value 값을 리턴해주고
//top객체에 below를 세팅하면 된다.
    if (this.top && this.top.below !== null) {
      const returnValue: string = this.top.value;

      this.top = this.top.below;

      return returnValue;


//값이 1개 이면 현재 value를 리턴하고 top을 null로 만들어 준다.
    } else {
      const returnValue: string = this.top.value;

      this.top = null;

      return returnValue;
    }
  }
마지막으로 size 함수를 구현해 보자.
 //지금 메모리에 있는 top객체를 복사하여 below를 계속 끌어올리면서 count를 올려주면 된다.

 size() {
    let size = 0;
    let cloneNode: OneNode = this.top;
    if (this.top) {
      while (cloneNode !== null) {
        size += 1;
        cloneNode = cloneNode.below;
      }
    }
    return size;
  }
모든 구현 사항을 모아 보면 아래와 같다.
interface Stack {
  size(): number;
  push(value: string): void;
  pop(): string;
}

type OneNode = {
  value: string;
  below: OneNode | null;
}

class DoStack implements Stack {

  private top: OneNode;
  constructor() {
    this.top = null;
  }

  size() {
    let size = 0;
    let cloneNode: OneNode = this.top;
    if (this.top) {
      while (cloneNode !== null) {
        size += 1;
        cloneNode = cloneNode.below;
      }
    }
    return size;
  }

  push(valueString: string) {
    if (this.top === null) {
      const node: OneNode = {
        value: valueString,
        below: null,
      };
      this.top = node;
    } else {
      this.top.below = {
        ...this.top,
      };
      this.top.value = valueString;
    }
    console.log(this.top);
  }

  pop(): string {
    if (this.top === null) {
      throw new Error("Not Exist value");
    }

    if (this.top && this.top.below !== null) {
      const returnValue: string = this.top.value;

      this.top = this.top.below;

      return returnValue;
    } else {
      const returnValue: string = this.top.value;

      this.top = null;

      return returnValue;
    }
  }
}


// test Area

const stack: Stack = new DoStack();

stack.push("a");
stack.push("b");
stack.push("c");

console.log("size===============" + stack.size());

console.log(stack.pop());
console.log(stack.pop());
console.log(stack.pop());
테스트 결과를 실행해 보면

마지막에 넣은 C부터 차례대로 출력되고 size도 3개가 들어가 있을 때 3으로 출력되는걸 알 수 있다.
'React, Javascript' 카테고리의 다른 글
| [React-Typescript] form 지옥에서 벗어나기 (formik) (0) | 2021.12.30 |
|---|---|
| [React] 상대경로 지옥에서 벗어나기 (craco) (1) | 2021.06.14 |
| [React] 무작정 React 시작하기 (0) | 2021.04.03 |
| nest js란? 기초 설치, 설계, 특징 (0) | 2021.01.16 |
| [React]별점(Star Rating) 기능 구현 (React + Typescript) (1) | 2021.01.08 |